

You need the Order or Admin role to place orders. See Sign in to DEKHQ.
1
Start a new order
Select + New order at the top of any page. You can also open the More ways to order menu (the arrow next to the button) and choose New order. The same menu has Reorder, New estimate, and Mockup Builder.The order builder opens on the Build order tab. A checklist in the lower right shows what’s left, and the Continue to Review button shows how many items you still need to finish.
2
Name the order
Enter a name in Name this order at the top left. The name is required.If you have a purchase order number, enter it in the PO field in the bar below the name. It’s optional.The upper right also has three optional settings. You don’t need them for a standard order.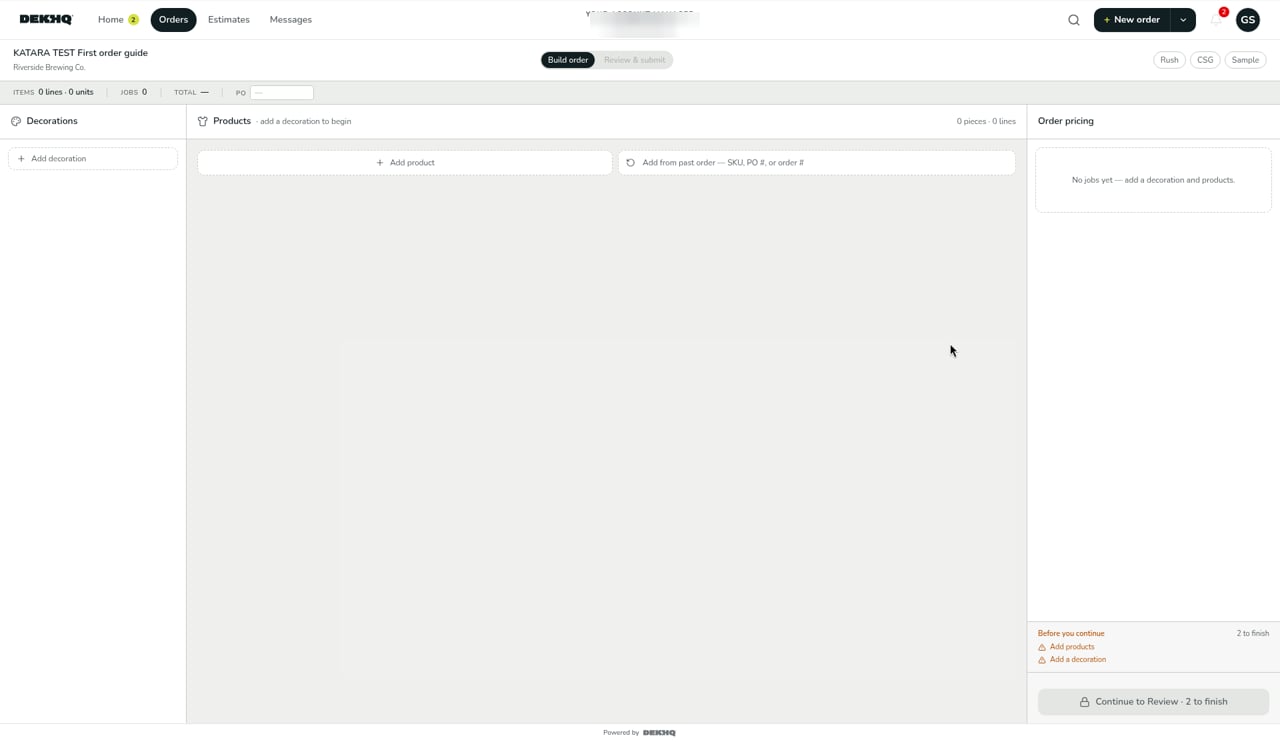
- Rush: opens a Rush turnaround menu of faster options, such as 5-Day Rush through Same Day Rush. Each option shows its surcharge and the new ship-by date. Your decorator sets the rush options and surcharges. Choose one to turn rush on, or select Turn off rush to go back to the standard turnaround.
- CSG: use this when you’re supplying your own garments or other goods for decorating (CSG stands for customer-supplied goods). The Customer-supplied (CSG) panel lets you check which products you’re supplying (or All items) and add your inbound tracking numbers, one per line. Select Done to close it, or Turn off CSG to clear it.
- Sample: marks the order as a sample. Rush isn’t available on sample orders, so turning on Sample turns Rush off.
3
Add a decoration
Under Decorations, select Add decoration. A five-step window walks you through it: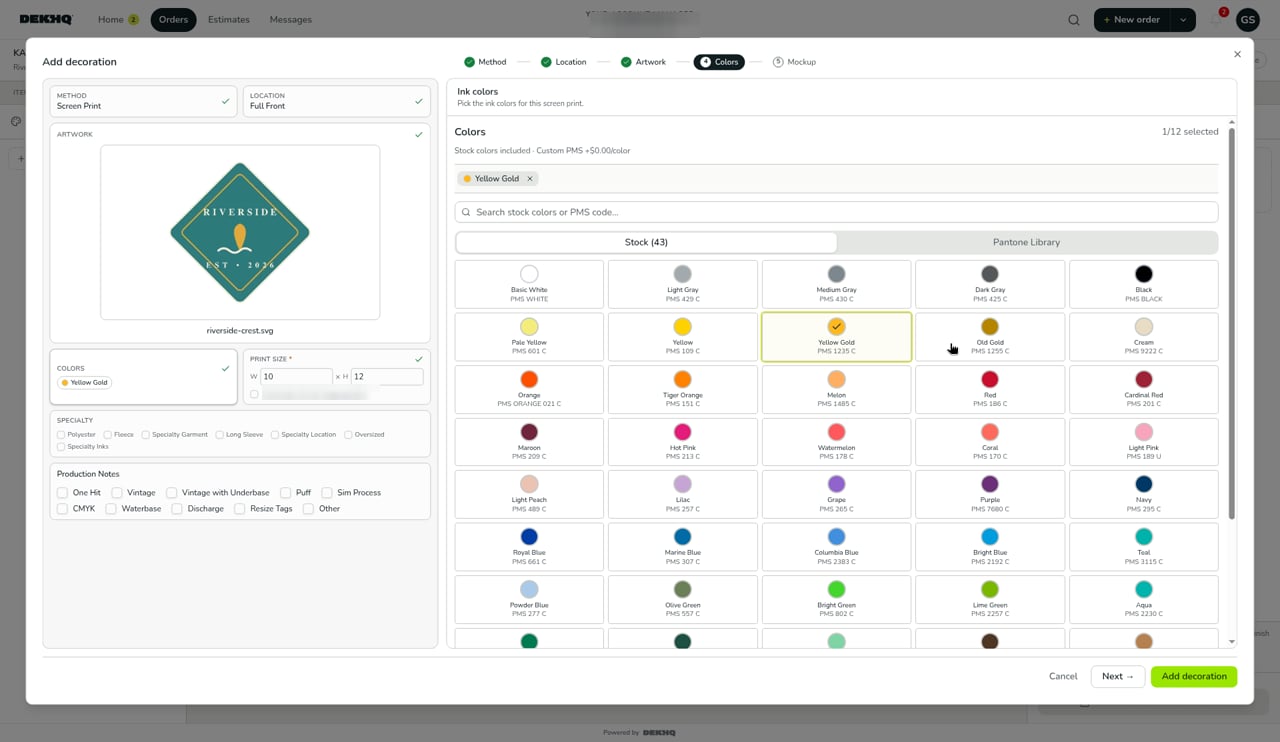
- Method: how the design is applied. Options include Screen Print, Embroidery, Direct to Garment, DTF / Vinyl, Heat Press, and Patches, plus tags and labels (Screen Print Tags, Heat Press Tags, CPSIA — SP Tags, CPSIA — HP Tags, and Sewn Label).
- Location: where it goes, such as Full Front, Full Back, or Left Chest. You can search the list.
- Artwork: select Upload art to add a new file, or Client library to reuse artwork already on your account.
- Colors (for screen print): pick your ink colors from the stock colors or the Pantone library. This step’s name depends on the method.
- Mockup (optional): upload a mockup if you already have one, as a reference for the art team.
Resellers: if you order on behalf of your own customers, your Client library holds artwork for their brands as well as yours. That’s expected. The library holds the artwork used on your account, whoever’s brand it is.
4
Add a product
Under Products, select Add product to open the Product Catalog.
- Search by style number, name, or brand. Type at least 2 characters.
- Select a product, then select a color.
- Select the Add … to Order button (for example, Add 3511 · Black to Order).
- Select Done. The button shows how many products are on the order, for example Done · 1 on order.
5
Enter quantities by size
Each product appears as a card in the builder with a box for each size. Enter how many pieces you want in each size.If the order has one decoration, it’s applied to every product automatically.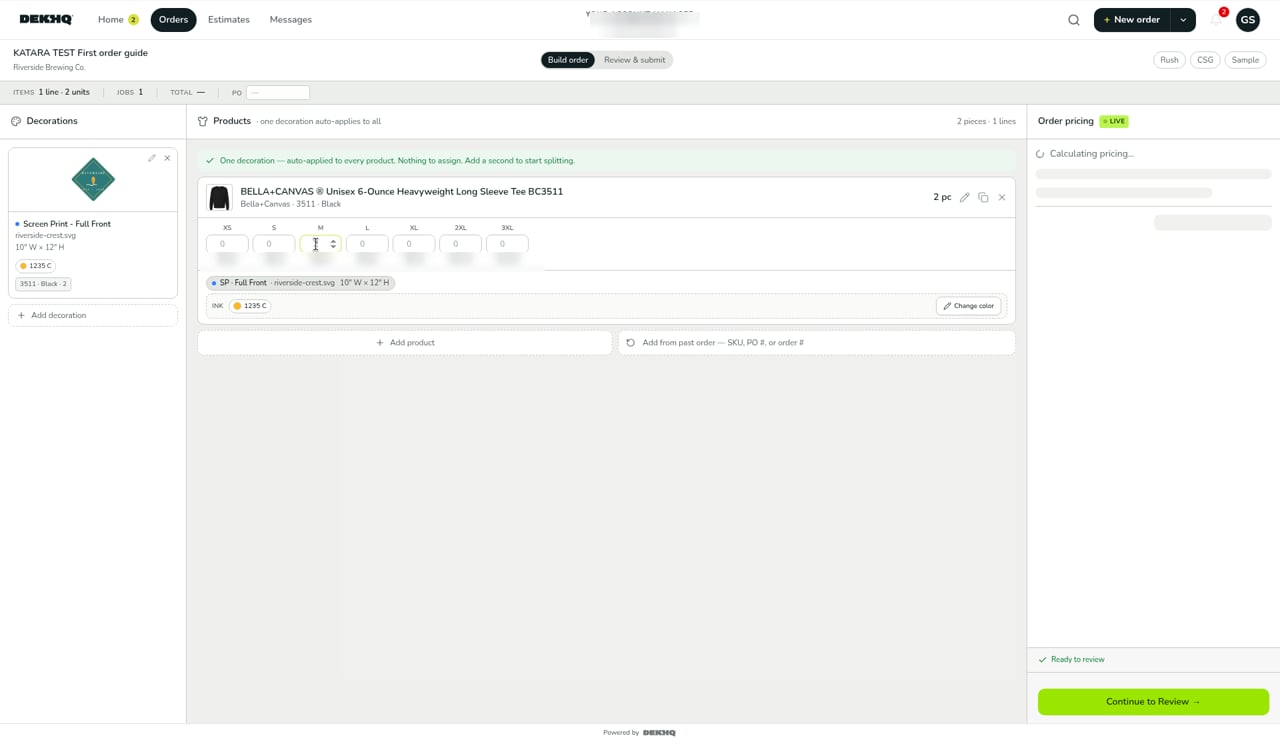
6
Review shipping and create the order
The Review & submit tab lists your Line items. Then: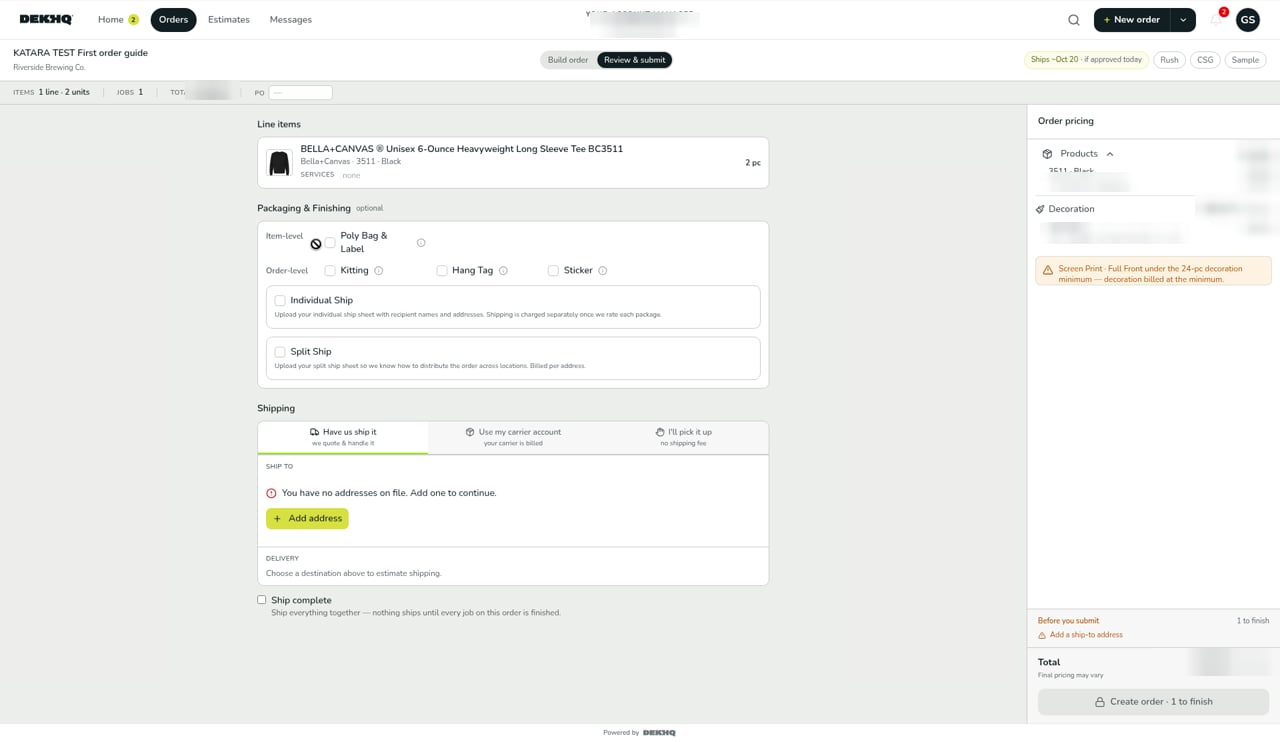
- Packaging & Finishing is optional. Leave it as is unless you need extra services.
- Under Shipping, choose how the order gets to you:
- Have us ship it: your decorator quotes and handles shipping.
- Use my carrier account: shipping is billed to your own carrier account.
- I’ll pick it up: you collect the order. There’s no shipping fee.
- If you have no addresses on file, you’ll see You have no addresses on file. Add one to continue. Select Add address. The address is saved to your address book, so you can reuse it on future orders.
- Enter a Label for the address, such as Main HQ. It’s required. Notes is optional, for anything the warehouse should know.
- Type the address: first and last name, street address, city, state, and ZIP. Company, Apt/suite, Phone, and Email are optional.
- Select Save address. If DEKHQ can’t confirm the address, you’ll see We couldn’t confirm this address. Double-check for typos, or save it as entered. Check for typos. If the address is right, select Save anyway.
- Select Save & use. It’s only available once the address has a label and you’ve saved the address.
- With Have us ship it and an address set, Delivery shows the box size and weight, and a shipping rate. DEKHQ selects the lowest-priced ground service for you. To choose a different service, select Compare N rates and pick one from the list. The delivery date is an estimate: shipping happens after production, subject to your approval.
- Check Ship complete if you want everything to ship together. Nothing ships until every job on the order is finished.
After you place your order
Your order’s page shows the order name, the order number and date it was placed, and the order total. Select View breakdown to see the total split into products, decoration, and fees (such as estimated shipping). The tiles below show where it ships, the shipping method, the estimated ship-by date, and the sign-off status.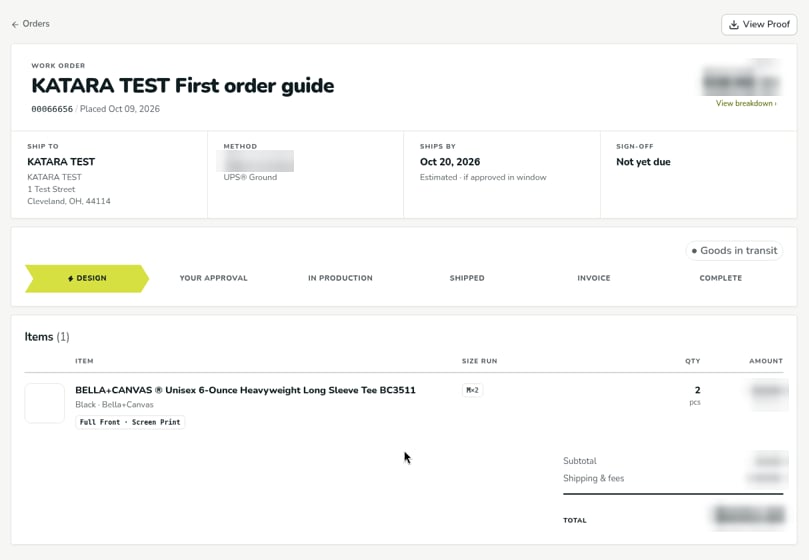
Approving your proof. While your order is in Design, the Sign-off tile says Not yet due, and there’s nothing for you to do yet. Approving your proof happens at the Your Approval stage. Review and approve your order covers the sign-off page.
Changes or cancellation. Before you approve, the order page has no button to change or cancel the order. To change or cancel it, message your account manager from the chat button in the lower right corner of the order page.
To follow your order from here, see Track your order status.
Verified against DEKHQ 41cdde7 on 2026-10-09